
First steps
-
Login to your GitHub account
-
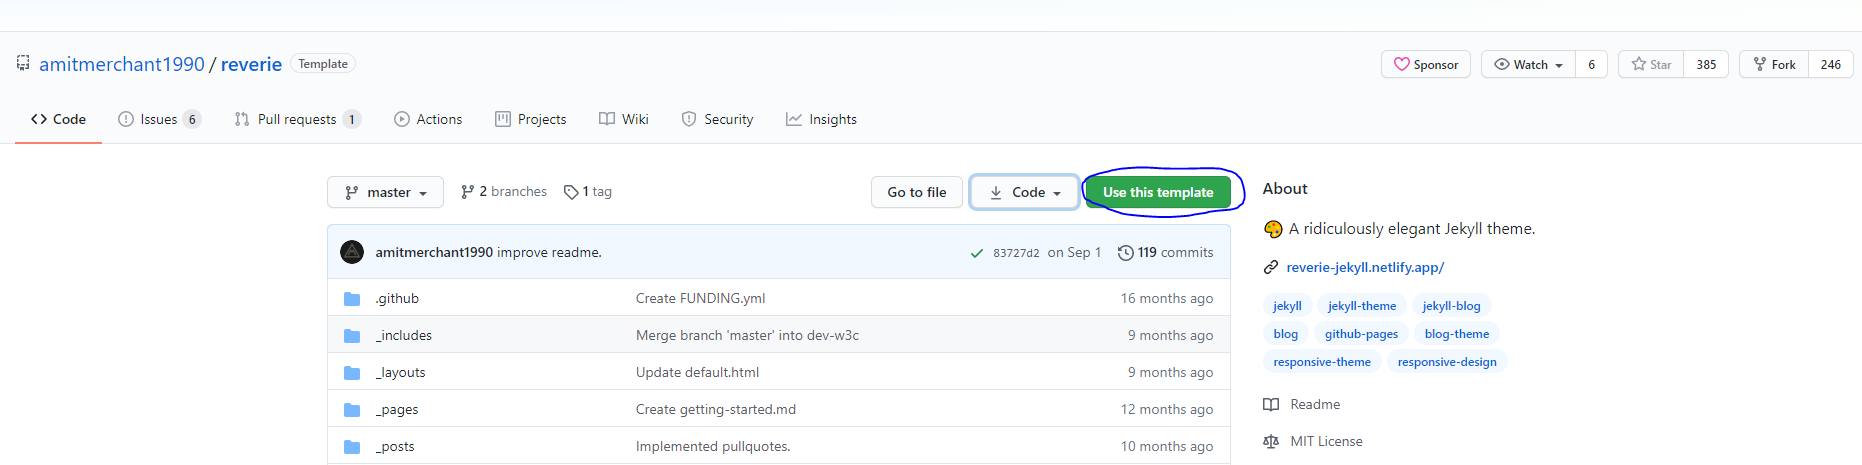
Browse to Reverie GitHub page
-
Click on Use this template
-
Give your repository a name of yourgithubusername.github.io
- Remember to change yougithubusername to your actual GitHub username

-
Your blog should soon be visible at yourgithubusername.github.io
- If blog is not immediately visible we’ll fix it in the next chapter
Customizing your site
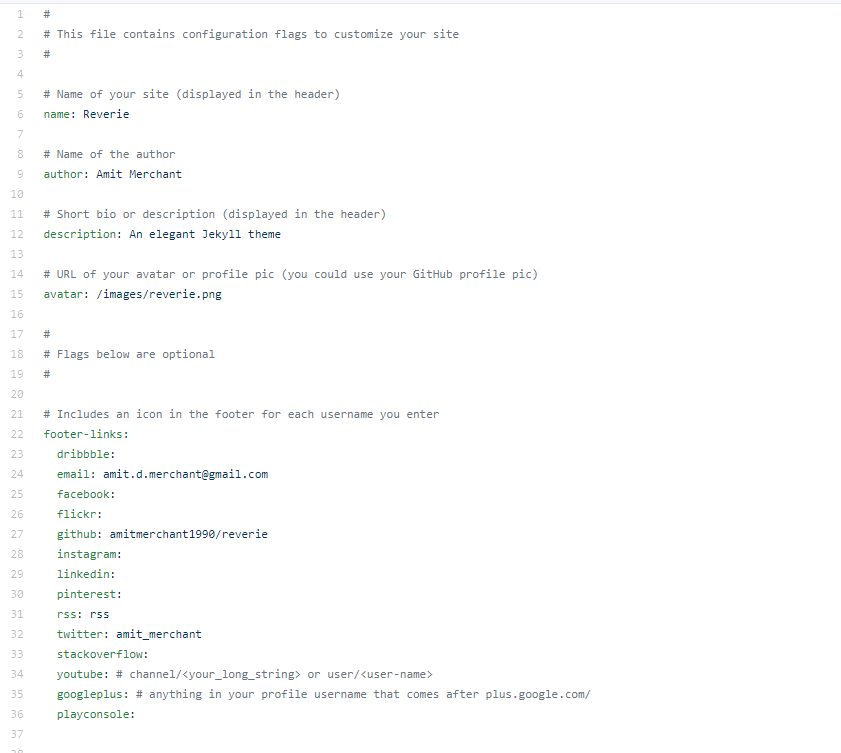
- Open up your _config.yml by clicking it in the GitHub

- There are plenty of configuration options available
-
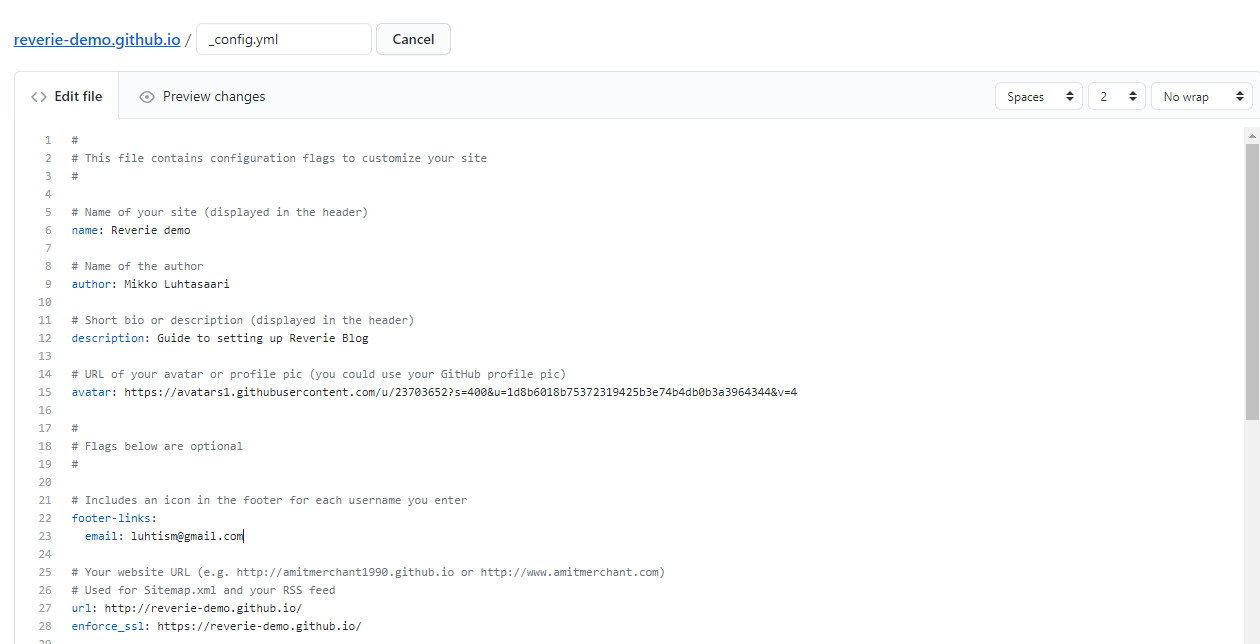
Change at least following:
-
name
- Name of your blog
-
author
- Your name
-
description
- A short description of your blog
-
avatar
- You can use for example your GitHub avatar if you have uploaded a picture there
-
footer-links
- Links to your other social media sites like LinkedIn, Facebook, Twitter etc etc.
-
url
- Your website url
-
enforce_ssl
- Your website url
-
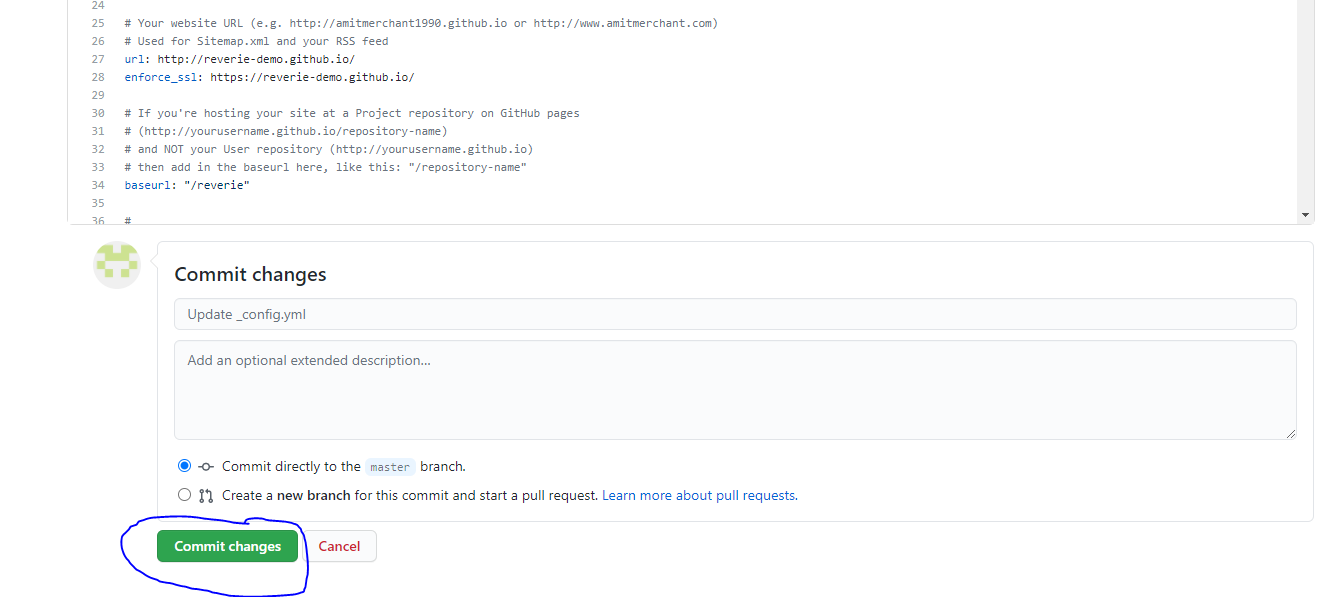
baseurl
- If you are following this guide you can remove baseurl
-
- From the bottom of the page click Commit changes
-
Now your blog should be all ready to go!
-
If you are still not seeing the blog or the styles seem a bit off try the following
-
Visit your blog in an incognito window, sometimes browsers cache assets.
-
Make sure that the baseurl is commented out
-
-
See my _config.yml for reference
Closing words
That was pretty easy wasn’t it?
In the next blog post we can remove default posts and start writing our very first blog post!